
Wondering how to make homemade gluten-free canned biscuits? Find out below.
How to Make Homemade Gluten-Free Canned Biscuits
Although it sounded absolutely impossible until a few years ago, today we really live in a world where it is possible to enjoy the best gluten-free foods. Today we will learn how to make homemade gluten-free canned biscuits.
We recently experimented in the kitchen and found the perfect recipe for flaky and tender biscuits, believe us, they are so similar to making traditional buttermilk ones. So, are you interested to find out more? We suggest starting with the details right away.
Simple Guide on How to Make Homemade Gluten-Free Canned Biscuits
Ingredients
- 2 cups of the gluten-free flour mix
- 1 tablespoon of baking powder
- 3/4 teaspoon of baking soda
- 2 tablespoons of table sugar
- A pinch of salt
- 1/2 cup butter (must be cold, not room temperature)
- A little butter to grease the pan
- Up to 1 cup buttermilk (preferably cold)
- 1 tablespoon of unsalted butter (must be melted)
Equipment
- Mixer (hand or stand-alone)
- Biscuit cutter (preferably 2 1/2-inch)
Step-By-Step Guide

Step No. 1: Prepare & Combine the Dry Ingredients
First measure the dry ingredients (flour, baking powder, baking soda, sugar, and salt). Then put them in a bowl where you will mix them with a mixer. It would be preferable to use a mixer that has a paddle attachment, but ordinary whisks will also work.
Step No. 2: Add the Butter
After you have prepared everything, add the butter that you will previously cut into smaller pieces. That’s exactly why it’s important to keep it cool.
Put the mixer on the lowest possible speed and beat for about one minute. It isn’t necessary to strive to create a uniform mixture, even more, it is desirable to have visible pieces of butter about the size of marbles or even a little bigger.
If you notice that some pieces haven’t flattened to the desired level, feel free to press them between your fingertips to break them up a little bit. It turned out to us that the dime-sized pieces are just perfect.
Step No. 3: Add the Buttermilk
Add two tablespoons of buttermilk to it and combine everything with quick movements of the fork. After that, add the remaining 3/4 cup of buttermilk and mix with a fork until no traces of flour remain.
Now be careful and thoroughly inspect the dough, if it seems too dry you can add extra buttermilk. However, don’t overdo it because you don’t want to end up with wet dough.
Step No. 4: “Massage” the Dough
First, flour the surface on which you will gather the dough into a ball. When you dump the dough out of the bowl onto the work surface, you will have a crumbly mess, but don’t worry, after a short “massage” with your hands, the dough will become a nicely formed ball.
You can also add extra buttermilk if the texture doesn’t seem ideal, but be careful.
Step No. 5: Fold the Dough
Now it’s time for the finishing touches on the dough. All you have to do is press or roll out the dough into a thick rectangular shape, ideally 4 inches by 6 inches.
Then try to fold the dough like a letter. It’s very simple, take the short ends of the dough and roll them towards the middle, and then the other. After you finish, rotate the dough 1/4 turn, press it again or roll it out, and finally fold it into thirds. Repeat this whole process one more time and that’s it.
Wrap the dough in plastic wrap to avoid a crust, then leave it in the fridge to rest for at least half an hour, if you can wait a full hour, that’s the best you can do.
Pro Tip: Some people like to avoid repeating the process, but we wouldn’t advise you to. Namely, in this way, you will create fluffy layers, and if you skip it, the biscuits will never be perfect but flat like a hockey puck.
Step No. 6: Prep the Oven & Pan
All you need to do is preheat the oven to about 425°F, depending on the power of your oven. Then, choose whether you want to bake your biscuits in a cast iron pan or a glass baking dish. Grease thoroughly.
Step No. 7: Rolling & Cutting Biscuits
After removing the dough from the refrigerator, put it back on a floured work surface and roll it out to a rectangle about 6 X 9 inches and 1 inch thick.
This is where the biscuit cutter we mentioned earlier will come in handy. Be sure to flour it to avoid sticking, and only then cut out about 6 biscuits by pressing the cutter straight down into the dough.
You don’t have to throw away the rest of the dough, what’s more, you can reuse it. Simply roll it up again and cut it out. Repeat the process until you run out of dough.
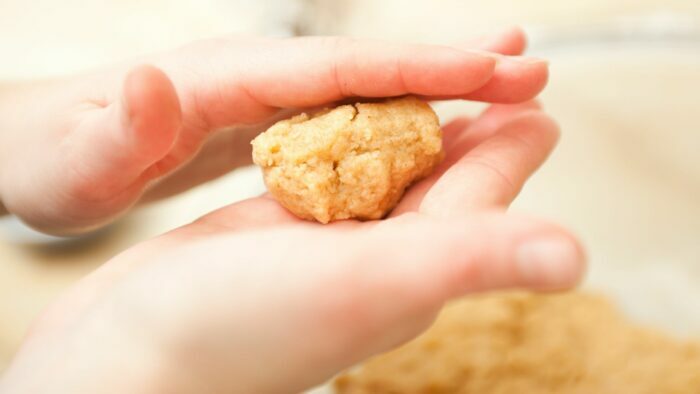
Step No. 8: Bake & Serve
Bake them until they get a nice golden brown color. Remove from oven and brush with melted butter. Wait for it to cool and enjoy the rich taste.
That’s it, now you know how to make homemade gluten-free canned biscuits.
Read more about Healthy and Tasty Gluten-Free Snack Ideas Your Kids Will Love
To Conclude
Do you have any tips or tricks on how to make homemade gluten-free canned biscuits? We would be more than happy if you share them with us!
If you have any questions, don’t hesitate to contact us in the section below.
Also, speaking of perfect recipes, take a look at this one. We believe it will knock you off your feet.